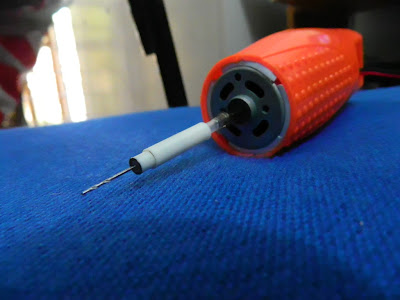
Was thinking of making a small, lite weight and easy to use PCB driller for sometime. So today I stopped thinking and decided to do it. All of you can make one like this within no time. Here is some things you need:
- A dc motor
- A push-to-make switch
- An old torch
- An old lead pencil
- Some wires
- Double sided tape
- And some screws, a drill bit, a candle, match box etc etc......
2.Now take the end of the lead pencil. The part marked in the above picture will be used to hold the drill bit. Now heat the transparent end of this holder and insert it to the motor's shaft, as show in the below picture:
3. Now you need to find something to fix this inside. I had an old torch, I just hacked it took its body cut it and made a casing for my drill.
4. So you got the casing and the motor set. Now to wire up this whole thing. Solder the positive terminal of the motor to one end of the switch and other end of the switch should be connected to the positive terminal of the power supply. The ground terminal of the power supply is connected directly to the ground terminal of the dc motor. And that's it! Just check that every thing is working properly.
5. Now its time to assemble all the things together. I used double sided tape to fix the motor to its casing and made a hole on top of it to fix the switch in it. By this time our drill looks something like this:
Its almost complete now. Cover up the whole thing and try it! The completed thing looks something similar to this:
Its time to have a test drive.....!
Don't forget to comment. If you need any help just contact me.....


No comments:
Post a Comment